Writing Consistent Image Prompts That Match Characters
Generating 16 by 9 Scene Images in Leonardo AI
Animating Still Images Into Video Clips
Adding Simple Motion Prompts That Look Cinematic
Batching Your Workflow With Daily Credits
Making a Custom Music Track
Prompting Suno for Mood and Genre
Downloading Versions That Fit Your Story Arc
Editing Everything Into a Finished Video in CapCut
Assembling Around the Voiceover First
Tightening Pacing by Cutting Pauses
Syncing Clips to Narration and Using Reverse Loops
Transitions Sound Effects and Auto Captions
Export Settings for YouTube Quality
Publishing for Clicks and Watch Time
Titles Thumbnails and Descriptions That Set Expectations
Tool List and Credits Without Hurting Retention
Monetizing Without Waiting for Ads
Why Affiliate Links Fit Faceless Tutorial Content
Where to Find Partner Programs for AI Tools
How to Write a Tools I Used Section That Converts
A Repeatable Blueprint for Your Next 10 Videos
Keeping a Prompt Library and Asset Folders
Scaling Output While Maintaining Quality
1. Getting Started With Faceless AI YouTube Videos
Faceless YouTube videos make it possible to publish consistent content without a camera setup, studio lighting, or on-screen presence. The core idea is simple: write a short story script, generate a voiceover, build matching visuals, add music, then edit everything into a watchable video. Many creators treat this as a side project that can grow into steady income, largely because the workflow can be repeated quickly once the basics are set.
The other advantage is flexibility. You can produce animated stories, mini documentaries, tutorials, or narrated shorts using a similar pipeline. Free and freemium tools lower the barrier, so you can test concepts before spending money.
Start small. One story. One upload.
2. Why Viewer Retention Comes First
Viewer retention is the percentage of a video people actually watch. It signals to YouTube whether your video kept attention or lost it early. If people stay longer, the platform has a reason to recommend the video more often, which can lead to higher impressions, more clicks, and more watch time.
Retention starts before editing. It begins with the idea and the structure of the story. A clear setup, a steady chain of events, and a satisfying payoff give viewers a reason to continue. Even short videos benefit from structure, because confusion or slow pacing creates exits.
A strong retention mindset changes your decisions. You write tighter scripts, remove empty pauses, keep scenes moving, and match visuals to narration so the audience never feels lost.
3. Choosing a Story Idea That Hooks
A hook is not a gimmick. It is a reason to care quickly.
Good hooks often include a character with a specific trait, a goal, or a problem that feels personal. “A curious sloth who collects lost buttons” is more memorable than “an animal in a forest.” The details create instant imagery and help the audience predict the type of journey they are about to watch.
Emotional themes help, even in light stories. Belonging, letting go, fear, friendship, pride, and forgiveness can all work. The theme gives weight to simple actions, which helps a short script feel complete rather than random.
4. What a Strong Beginning Middle and End Looks Like
The beginning introduces the character and the situation fast. You want the audience oriented within seconds: who the character is, what they want, and what makes the situation interesting. A strong first line can even be built into your prompt, such as starting the narration with “Meet name.”
The middle is where small events stack into momentum. The character makes choices, meets obstacles, and experiences turns that change their understanding. In a short format, the middle still needs progression. If every scene feels identical, attention drops.
The end provides payoff. It can be a lesson, a reunion, a twist, or a gentle emotional landing. Satisfying endings feel earned, not rushed. Even a 100-word script can land well if it resolves the main tension and closes the theme.
5. A Reusable Prompt Template for Fast Story Drafts
A practical way to draft scripts quickly is to use a reusable prompt template in a free AI chat tool such as DeepSeek. The template guides the AI to produce stories that already have structure.
A useful format asks for:
– A character type and a distinctive interest or action
– Two emotional themes to guide the meaning
– A relationship dynamic, such as a caring older sibling
– A clear beginning, middle, and conclusion
– A target length, such as around 100 words
– A specific starting phrase, such as “Meet Bernard.”
With a template like this, you can swap in new characters and themes while keeping the same story shape. That consistency matters if you plan to publish frequently, because it reduces decision fatigue and speeds up production.
6. Editing AI Output to Add a Human Touch
AI drafts tend to be clean but generic. A quick edit can fix that.
First, add specificity. Swap vague words for concrete details: the color of a lantern, the sound of a creek, the feel of cold air. Second, adjust rhythm. Read the script out loud and shorten lines that feel too long. Third, add a surprising turn that still fits the story’s logic. A small reveal can keep attention without forcing randomness.
Keep the language natural. If a line sounds like a summary instead of narration, rewrite it. The goal is to make the script sound like a person telling a story, not a tool presenting one.
7. Creating a Natural Sounding AI Voiceover
Once the script is ready, the next step is narration. AI voice tools remove the need for microphones, treated rooms, and vocal performance skills. ElevenLabs is commonly used for realistic results, and the workflow is straightforward: paste the script, pick a voice, generate, then download the audio file.
The voiceover becomes the spine of the whole edit. If the narration is clear and pleasant, everything else becomes easier to assemble.
8. Picking the Right Voice for Your Audience
Voice choice affects how the story feels. A playful story often fits a younger, lighter voice, while a reflective story may need a calmer tone. If your visuals are cartoon-like, a warm and animated voice can match well. If your visuals are cinematic, a grounded voice may fit better.
Also think about clarity. Voices with strong accents or extreme expressiveness can be interesting, but they can also reduce comprehension. For faceless channels, the voice often becomes the “host,” so consistency across uploads helps viewers recognize your content.
9. Generating and Exporting Clean Audio
After generating the voiceover, listen for issues: mispronounced names, awkward emphasis, or robotic pacing. Fixing these before editing saves time later. Many creators regenerate small sections rather than redoing the entire narration.
Export your voiceover as a high-quality audio file and name it clearly. Good file naming prevents mistakes once you have dozens of clips.
10. Building Visuals for Every Beat of the Story
Visuals help retention by giving the viewer something new to look at as the narration progresses. A common approach is to generate scene images for each moment, then convert those still images into short animated clips.
This is usually a two-step system:
1) Use an AI chat tool to convert your script into image prompts.
2) Generate the images in an AI image tool such as Leonardo AI.
Short scene changes can be enough. The viewer mainly wants forward motion.
11. Turning a Script Into a Scene List and Shot Plan
A script can be translated into a list of scenes by prompting DeepSeek to output individual prompts per beat. Many creators aim for around 30 prompts so the visual changes keep pace with narration. If a moment is complex, it can be split into two or three prompts.
A good shot plan describes setting, character action, mood, lighting, colors, and optional art style. Keeping prompts under 50 words forces clarity and helps maintain consistent results.
12. Writing Consistent Image Prompts That Match Characters
Image tools do not remember your character unless you restate them. That is why character descriptions are commonly placed in brackets inside every prompt. Include key traits that should not drift: species, age vibe, clothing or accessories, and any signature item.
Consistency also comes from repeating art style choices. If you pick a 3D render look, keep it for the entire set so the final video feels cohesive rather than patched together from different aesthetics.
13. Generating 16 by 9 Scene Images in Leonardo AI
Leonardo AI can generate images using free daily credits, which helps creators practice without upfront costs. Set the aspect ratio to 16:9 for standard YouTube framing. Choose a model preset, then select a style that fits the story, such as 3D render.
Generate one prompt at a time, download results, and store them in a folder that matches the scene order. This small organizational step speeds up editing later.
14. Animating Still Images Into Video Clips
Still images can hold attention for a moment, but short motion helps the viewer feel progress. Tools such as Pixverse can turn images into animated clips. The process is typically upload, add a motion instruction, then generate a short video.
You do not need complex animation instructions. Simple movement often looks best because it avoids distortion.
15. Adding Simple Motion Prompts That Look Cinematic
Motion prompts should describe one clear action: slow camera push-in, gentle wind in leaves, character blinking, subtle head turn, floating particles, or drifting light. A line like “A slow-moving sloth crouches on a mossy log” gives the system a clean direction.
Avoid stacking multiple movements in one request. The more actions you demand, the more likely the clip will look messy.
16. Batching Your Workflow With Daily Credits
Freemium tools often provide daily credits. A practical routine is batching: generate images in one session, animate them in another, then edit in a final block. This lets you use credits efficiently and keeps your creative focus on one type of task at a time.
Save everything in clearly labeled folders: Images, Animated Clips, Voiceover, Music, Project Files. Small habits scale well.
17. Making a Custom Music Track
Music sets tone quickly. Custom tracks can make your video feel distinct, even if the visuals were generated with common tools. Suno AI can create original music based on a text prompt, letting you match the mood to the story’s arc.
Keep music supportive. The narration remains the priority.
18. Prompting Suno for Mood and Genre
A solid music prompt includes mood, genre, tempo, and instruments. For a gentle forest story, you might ask for warm ambient tones, soft percussion, or light acoustic elements. If the story has a tense moment, you can generate a second variation with darker harmonies, then switch tracks during editing.
You can also ask your chat tool to help write music prompts that match specific scenes.
19. Downloading Versions That Fit Your Story Arc
Generate multiple versions and pick the one that matches your pacing. Some versions will feel too busy, others too flat. Download the best option, and consider exporting more than one track if your story changes emotional direction.
Keep the volume low under narration. Very low.
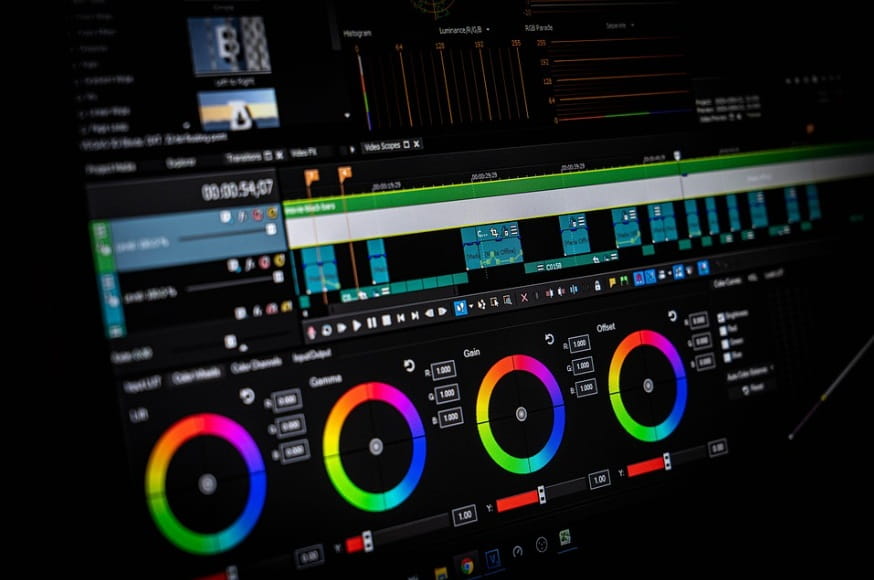
20. Editing Everything Into a Finished Video in CapCut
CapCut is a popular free editor on desktop and mobile, and it supports the full workflow: audio, video clips, transitions, sound effects, and captions.
Editing is where retention is protected. A good script can still fail if pacing drags or the visuals do not match the words.
21. Assembling Around the Voiceover First
Place the voiceover on the timeline before anything else. This turns the narration into your map. Then align clips to the spoken beats, swapping visuals whenever the sentence changes topic or emotion.
If a line is about discovery, show the moment of discovery. If the line is about loss, shift lighting and expression to match.
22. Tightening Pacing by Cutting Pauses
Listen for dead air, long breaths, and awkward spacing. Use the split tool to remove pauses that do not add tension or emotion. This simple edit often increases watch time because the video feels purposeful.
Keep short pauses only when they enhance meaning.
23. Syncing Clips to Narration and Using Reverse Loops
If a clip ends before a line finishes, a clean trick is duplicating the clip and reversing the duplicate. The motion flows forward, then backward, which feels smoother than a hard loop restart. This is especially useful for subtle camera moves or drifting background elements.
Use this sparingly. Too much looping becomes noticeable.
24. Transitions Sound Effects and Auto Captions
Simple transitions such as fade or blur can smooth cuts, but they should not distract. Sound effects, like gentle whooshes or forest ambience, can add texture if kept quiet.
Auto captions help comprehension and can improve retention, especially for viewers watching without sound. CapCut can generate them automatically, and you can style font and animation for readability. Choose clean, high-contrast text and avoid covering key visuals.
25. Export Settings for YouTube Quality
For standard uploads, 1080p resolution with 60 FPS is a solid target. Keep bitrate high enough to avoid blocking in gradients and dark scenes. Watch the exported file once before uploading to ensure audio balance is right and captions are readable.
26. Publishing for Clicks and Watch Time
Publishing decisions set expectations. Your title and thumbnail should match the video’s promise. If they overpromise, viewers click and leave quickly, harming retention. If they underpromise, fewer people click.
Aim for clarity: what the video is, what style it is, and who it is for.
27. Titles Thumbnails and Descriptions That Set Expectations
A strong title hints at the story and emotion without being vague. Thumbnails should be readable on mobile, with one clear character, one clear setting, and a facial expression or action that signals the mood.
In the description, briefly state what viewers will see, then list the tools used. Keep the first lines focused on the content, since that section is most visible.
28. Tool List and Credits Without Hurting Retention
Viewers often want to know how the video was made. Put your tool list in the description under a simple heading, then add links. Avoid placing a long list before the main description text, since it can look spammy.
Keep credits clean. Short, organized, and easy to scan.
29. Monetizing Without Waiting for Ads
Ad revenue requires eligibility and time. Affiliate marketing can work earlier because it aligns with viewer curiosity: people want the same tools and workflow you used to create the video.
If your audience is watching tutorials or “how it was made” breakdowns, affiliate links can fit naturally, since the tools are part of the value you provide.
30. Why Affiliate Links Fit Faceless Tutorial Content
Faceless channels often rely on process. That makes tools a central topic, not an afterthought. If a viewer asks, “What voice tool is that?” or “How did you animate the images?” your affiliate link answers the question quickly.
The key is trust. Only link tools you actually used in the video, and avoid overloading the description with unrelated offers.
31. Where to Find Partner Programs for AI Tools
Most tools list their partner programs in the footer or help sections under labels such as “Affiliates,” “Partners,” or “Become a Partner.” Sign up, receive a unique tracking link, and use that link in your video description.
Track performance over time. Some tools convert better than others depending on your audience.
32. How to Write a Tools I Used Section That Converts
A converting tool section is skimmable. Use short lines and direct labels, such as:
– Voiceover: tool name – link
– Images: tool name – link
– Animation: tool name – link
– Editing: tool name – link
Add one short sentence explaining why each tool was used. Keep it practical, not salesy. If a viewer clicks, it should feel like the next logical step.
33. A Repeatable Blueprint for Your Next 10 Videos
Once you finish one video, the goal becomes consistency. The workflow becomes faster as you reuse templates, styles, and folder structures. After a few uploads, you will know which story themes hold attention and which visuals perform best.
Repetition builds skill. It also builds a library.
34. Keeping a Prompt Library and Asset Folders
Save your story prompt template, your image prompt template, and a few proven variations for different moods. Store them in a document so you can copy and customize quickly.
Use reusable folders: Project 01, Project 02, and so on. Inside each, keep Voiceover, Images, Clips, Music, and Exports. This makes it easier to revise old videos, create sequels, or reuse a character design consistently.
35. Scaling Output While Maintaining Quality
Scaling is not about rushing. It is about removing friction.
Batch script writing, then batch voiceovers, then batch visuals. Keep a consistent visual style and a consistent voice. Continue trimming pauses and aligning visuals to narration, since pacing is where many faceless videos lose viewers.
The tools are accessible. The advantage comes from how you combine them, refine them, and publish regularly.